How to Make Origami Lucky Star
In our quest to provide you with the most comprehensive guide on crafting origami lucky star, we embark on a creative journey filled with intricate folds and whimsical patterns. Origami, the Japanese art of paper folding, has captivated the hearts of many worldwide. Among its myriad creations, the origami lucky star stands out as a symbol of hope, luck, and creativity. In this tutorial, we'll walk you through every step of crafting these delightful paper stars, ensuring that you not only understand the process but also gain the skills to create them effortlessly.
Materials You'll Need
Before we delve into the fascinating world of origami lucky star, let's gather the materials required for this artistic endeavor:- Origami Paper: Obtain a pack of origami paper in various colors and sizes. The standard 3x3 inch sheets are perfect for beginners.
- A Flat Surface: A clean, flat surface is essential for precise folding. A table or desk will suffice.
- Patience and Focus: Crafting origami stars is a meticulous process, so make sure you're in the right mindset.
Selecting Your Paper
The first step to creating beautiful origami lucky star is selecting the perfect paper. Origami paper comes in an array of colors, allowing you to unleash your creativity. Choose vibrant hues or opt for a more traditional look with shades of blue, yellow, and pink.Folding the Paper
- Begin with a square piece of origami paper, with the colored side facing down.
- Fold the paper diagonally in half, creating a triangle.
- Unfold the paper and fold it diagonally in the opposite direction, forming an 'X' shape on the paper.
- Unfold the paper once again, revealing an intersection of creases.
Forming the Initial Shape
- Hold the paper so that it resembles a diamond shape, with the colored side facing up.
- Fold the paper in half vertically, creating a smaller diamond shape.
- Now, fold the left and right corners of the diamond towards the center crease. You'll have a kite-like shape.
Creating the Lucky Star
- Flip the paper over to the other side, revealing a white triangle.
- Fold the bottom point of the triangle up to meet the top point, creating a smaller triangle.
- This is where the magic happens! Gently pinch the sides of the triangle to bring it to life, forming your origami lucky star.
Final Touches
- Congratulations! You've created your first origami lucky star. Repeat the process with different colors and sizes of paper to craft a collection of stars.
- To make your stars more vibrant, you can insert them into a clear glass jar or use them as decorative accents for gifts and cards.
Expert Tips for Origami Enthusiasts
- Experiment with various paper sizes to create lucky stars of different dimensions.
- Use metallic or glitter origami paper for a touch of elegance.
- Practice makes perfect! Don't be discouraged if your first stars aren't flawless; it takes time to master this art.
Conclusion
Crafting origami lucky stars is not just a creative endeavor; it's a symbol of patience and precision. These charming stars can serve as heartfelt gifts, eye-catching decorations, or tokens of good luck. With practice and dedication, you'll soon become a master of this mesmerizing art form. Now, go ahead and embark on your origami adventure, creating beautiful stars that shine brightly in your life. for Easy Origami Videos. for other Easy Origami Instructions. https://www.youtube.com/embed/d0pIWpqpNBs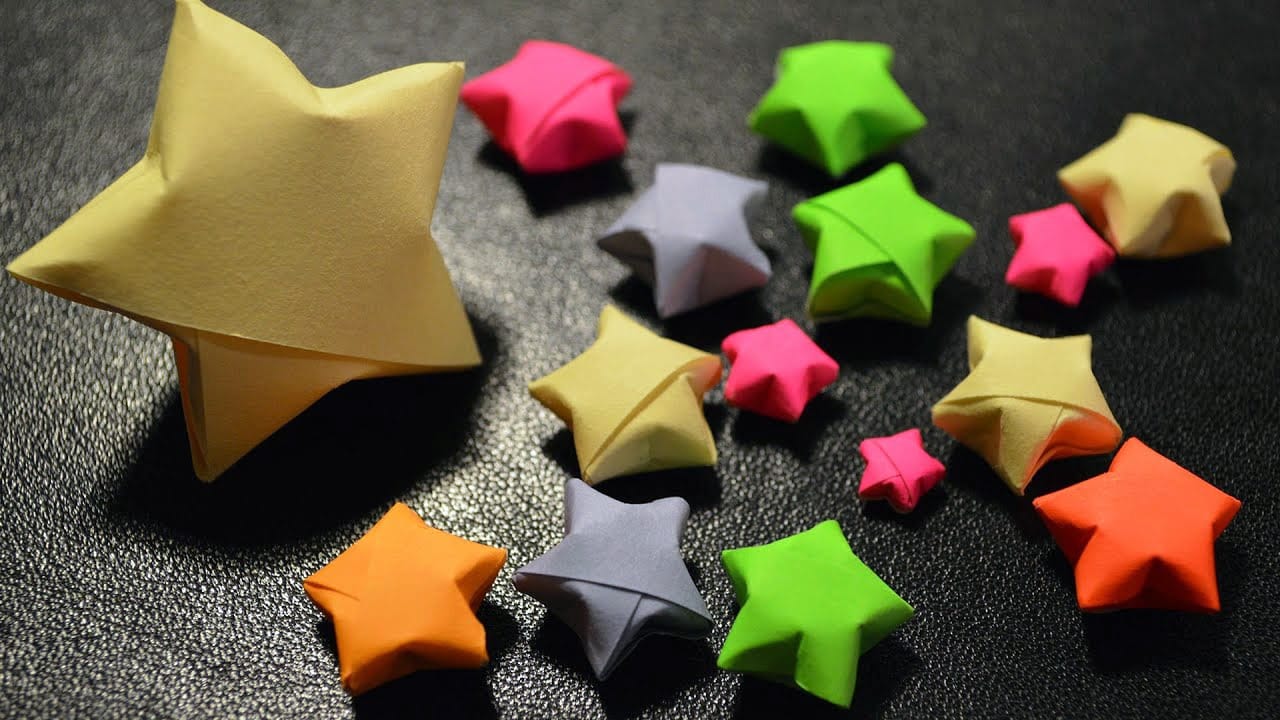
Level
—
Time
—
Paper
—